jerryy
-
Posts
1,926 -
Joined
-
Last visited
-
Days Won
304
Content Type
Forums
Gallery
Store
Everything posted by jerryy
-
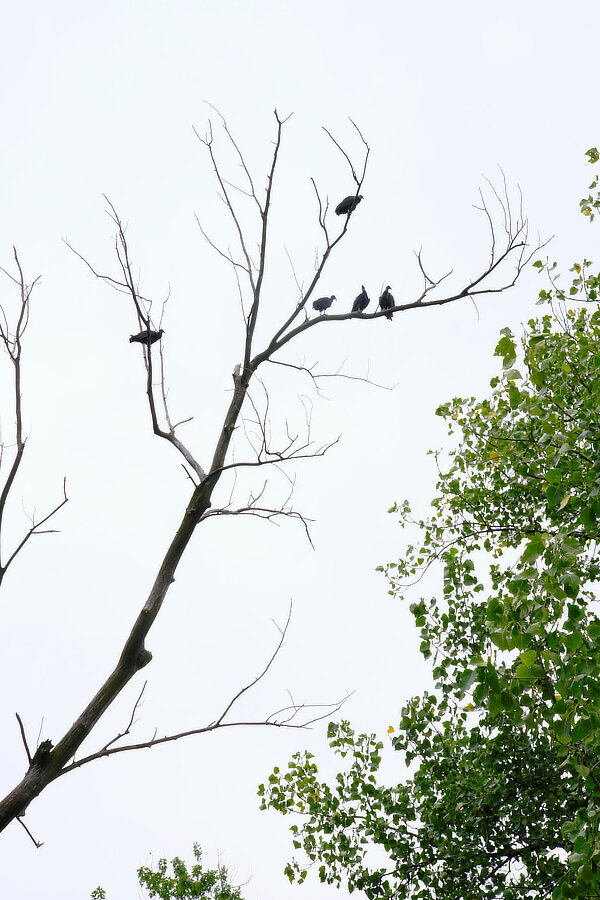
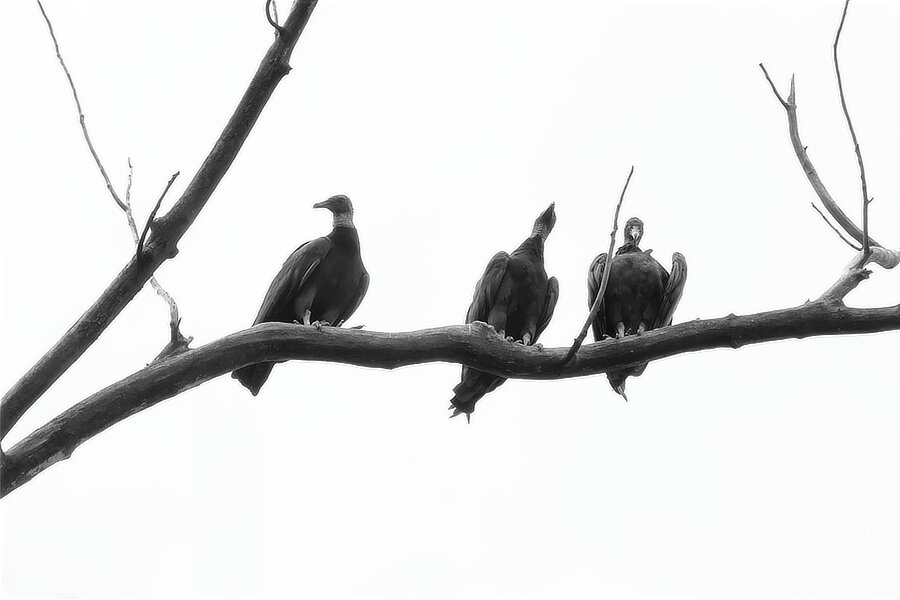
They eat dead things ... Black Vultures (Coragyps atratus)

-
For the X-T3, X-T30 it is possible. while in shooting mode, (ready to take a photo) if you press the disp/back button, you can toggle the information overlay screen on and off — in the viewfinder. This is useful for those that want to check their settings now and then or want to use the whole viewfinder for the image. edit: It works that way on the X-T1 and X-T10 as well. This may be possible for the X-T2 as well, but I do not own one of that model, so I cannot say if it is or not. but it something that can be easily checked.
-
This is their worldwide listings for contact page: https://www.fujifilm.com/contact/?_ga=2.174851106.1083947626.1597791919-1172674169.1597791919 Also, sometimes, the various sites have 'submit ideas for firmware upgrades' suggestions. Try bouncing the idea off of them as well. Having more support among other photographers helps. May I suggest the following as an approach? Leave the way the joystick works with the up arrow looping through the information screen choices as it is at the moment. Change the disp/back button to simply toggle the (chosen) information screen overlay on and off in the same way as it does in the shooting menu. So the shooting and playback menus gain consistency, a bonus! This will get you what you want with minimal effort on the users' part. The four choices available from the joystick keep the built in redundancy of turning the information screen off, the user can choose the screen they want to mainly use then scroll through the images with the ability to turn the overlay on and off with the disp/back--one-button-touch. While scrolling back and forth between the menus is nice, it is not as necessary with this approach. Additionally, and this is important, this will not need additional space in the firmware. A lot of ideas, as good as they are, are not be able to be incorporated because they take up too much space in the firmware. This does not.
-
Being able to go backwards as well as forward would be nice. Currently, in shooting mode, if you look through the viewfinder, you can use the disp/back button to toggle the information screen on and off, Have you considered submitting it as a firmware fix?
-
I am not certain I completely understand what you are wanting to do ... Right now, you should be able to have some images on your card, press the playback button and then have your voice of four options for your viewing pleasure: just images, or images with one of three information screens. Once you have pushed the playback button, you can push the joystick "up" once and the first information screen (the standard one) will overlay the image. This one usually has the histogram on it. You can then push the joystick to the right or left and scroll through the images as you want. The next image will load, then the histogram and other information will overlay on the image. (You can also use the disp/back button to turn the screens on and the front command dial to scroll through the images.) You do not have to cycle through the information screens, beyond the first time, to get to the one you want to see with the image. The first information screen (the standard one) can be customized in the setup menus as to what options you want to display. If you are just wanting to toggle one of the information screens off and on for an image, that would be nice, but it raises the question of which screen should be the one being toggled.
-
There are quite a few out there, some free, some not. https://tonyphillips.org/product/xt4/?v=fdd13832cd81 https://www.amazon.com/Fujifilm-X-T4-X-Pert-Tips-Camera/dp/1681986752 https://archive.org/details/FUJIFILMTRICKS1. (note: Ken Wheeler is also known as Theoria Apophasis).
-
-
That is not completely true..., The part about ‘be careful’ is, but: The USB cable naming has becone a bit of a mess that the engineers at the USB overseer consortium created and are trying to fix. Essentially there are speeds and connector types. speeds: USB 1.0, USB 2.0, USB 3.0, USB 3.1 gen 1, USB 3.1 gen 2 and the upcoming USB 4.0. USB 3.1 gen 1 is actually just a renamed USB 3.O Unfortunately for us, because that renaming has caused oodles and oodles of confusion. The upcoming USB 4.0 is pretty much Thunderbolt v3 being released to everyone, not just Apple devices. connector types: Type A, Type B, Type C Type A is the most common, the ubiquitous flat connector that is usually plugged into phone chargers, and computers. Type B is most often used by printers. Type C is the latest revision and is becoming widely supported, especially since Apple decided to adopt this connector type for Thunderbolt v3. You can easily find many USB 3.1 gen 1 cables that use Type A connectors. They look just like the cable you use to charge phones. Do NOT buy these for your X-T3 or newer camera, the connector is the wrong one, so it will not work. Get the one with the Type C connector. The advertisement should tell you the connector type, whether it supports data and power or is power only — these are sold to protect you device from being hacked when you need to plug in to recharge, but do not really trust the power supplier, and the ad should tell you the speed. Type C connector with at least gen 1 speed.
-
If you are certain it is not the lens, it looks like you have grungy stuff on the sensor. That happens even with the auto-clean feature turned on. A lot of folks like using Eclipse sensor cleaner or something similar. Here is one option: https://photosol.com They sell various kits and standalone refills, etc. Your local camera shop may carry their products.
-
No, no cables (usb nor hdmi) are included. This is what you should have gotten in the box: Li-ion battery NP-W126SBattery charger BC-W126SShoe-mount flash unit EF-X8Shoulder strap, Body capStrap clipProtective coverClip attaching toolHot shoe coverVertical Grip connector coverConnector cover (detachable)Sync terminal coverCable protector Owner's manual Note: the usb connector is USB-C Gen 1. Gen 2 cables will work with your camera, as do Thunderbolt v3 cables, but you will not see any speed increases by using those newer cables.
-
Just a quick note: the X-T4 can give really good results well beyond ISO 3200 https://www.amateurphotographer.co.uk/reviews/compacts/fujifilm-x-t4-review-2/5
-
You have a good tool that you can grow into, so to speak. As you gain the experience, those extra buttons and dials open up options that you may want to use. Keep posting your images! In the end, technique is second to composition, the why you take the photo. After a month or so, when you have had time to practice and reflect on things, I will tell you a fourth option to the question you asked about how to capture those high dynamic range images — your landscape photos. But no doubt, you may discover it for yourself as you are going along.
-
After you have some practice at these, you might find it worthwhile to invest a couple of afternoons in a library learning about various photography techniques— wait until after you have that practice in so that what the authors are saying will make more sense. For instance, dragging the shutter — a wonderful technique, will seem like it is the opposite of what I have had you do in this thread. But it is not, not really.
-
Options two and three are really good ways to go. I never cared for option one for the reasons mawz mentions. Also, keep in mind that sunset, sunrise shots in general tend to look well with the contrast between color and dark.
-
Uh, before you do that, try looking at how the histogram works: (it has essentially almost replaced the light meter for digital cameras.) https://www.bhphotovideo.com/explora/photography/tips-and-solutions/how-read-your-cameras-histogram https://digital-photography-school.com/how-to-read-and-use-histograms/ https://www.cambridgeincolour.com/tutorials/histograms1.htm Two ideas for getting to know shutter speed versus aperture... 1) Find something that you can get to move toward you, away from you and then across your field of vision, a vehicle, a bicyclist, a person, a wombat, whatever works. Set the ISO as I mentioned previously, 200 for a brightly lit area, 800 for moderately lit areas, 6400 if it is darker. Set the f-stop on the lens to be wide open (the smallest number). Now pick a shutter speed, say 1/60. As the item moves in the directions, take a photo, then increase the shutter speed and take another, etc., etc. After you have taken a few, stop and review the images. Most of these will look streaky or blurry. This is called motion blur. (Camera shake is similar but the comes from you not holding the camera steady -- or your tripod wobbles.) You will come to the ones where the motion becomes frozen -- no more blurring or streaking. This, and the shutter speed that is a little higher is what you are trying to find. Not all of the subject will be in focus -- this is because the lens' f-stop is wide open. Keep that shutter speed and begin to stop the lens down (change the aperture) until you have as much of the subject in focus as you want. Each time, look at the histogram. If the image is getting darker, then bump the ISO up to keep the exposure as you want. 2.) Grab some fruit and vegetables and make an arrangement out of them on a table. Set the ISO as mentioned before. Set the shutter speed to say, 1/100. Set the aperture to wide open. Start taking photos, stopping the aperture down each time. This time when reviewing, you are looking for the setting when the various items stop looking like colored blobs and more like what your eyes see -- an orange should have pores and be curvy, etc. Again, watch the histogram and if you need to, bump it up a bit. I am hesitant to recommend a light meter, because most of them have cheat cards set for film, you would have to make adjustments for digital cameras. I may get yelled at for this, but ASA film speed do not directly match up with ISO speeds -- heck, for that matter, the digital camera manufacturers do not directly match up ISO speeds between each other. Practise for a while and show us some good photos!
-
Just concentrating on three changing things at once is a lot. Shutter speed, Aperture and ISO. For 'moving objects', setting a shutter speed and then not worrying about it any more -- changing aperture and ISO for getting the exposure. (racing, animals, etc.) For 'motionless objects', setting an aperture and not worrying about it any more, -- changing shutter speed and ISO to get the exposure. (landscape, still life, etc.) Hence the use the histogram approach. It tells you when you need to make changes to get exposure you want. It takes practice, it does. But it will get easier. You can set the dial buttons to make it easier to change the Iso and shutter speed so that you do not have to take your eye out of the viewfinder. This may help. Back in the film body days, some instructors would give their first lessons about how cameras and lens worked, then send the students out with the cameras loaded with ASA 200 film. The students would come back with very underexposed or overexposed images and be very unhappy. At which point the instructor would then tell them 'now you see why you need a light meter and cheat card'.
-
I am glad to hear your replacement camera is giving you better results. Hmm, to start, make a couple of changes: Turn off the setting for a minimum shutter speed. Set the ISO Setting in your menu to be the full range the camera can use and this may seem odd at the moment, but do not use Auto ISO for a while. (Your choice of limited ISO with a minimum shutter speed is what is causing the dark images.) Use 160-200 for bright scenes; 500-3200 for moderately lighted scenes, 6400-12800 for darker stuff. I skipped a few settings for a reason. You have OIS turned on, so as long as you can keep the camera fairly steady you should be able to use slower shutter speeds which will give you brighter (and sharper images). For that lens, shutter speeds down to 1/50 should easily give you sharp images. Turn on the histogram in the viewfinder/lcd display and watch it as you choose scenes to get images. That will tell you when you need to make adjustments to the ISO for a given shutter speed and aperture setting. Find an easy to hold five pound (2.3 kg) weight and use it to exercise the arm/hand you use to hold the camera body. Really. Your holding hand will then become steadier. If you have not guessed, I am pushing you towards using the camera In fully manual mode. It looks like once you see how the basic parts work together, you will be fine. Then enjoy the auto parts turned back on as you want.
-
Possible to save camera settings?
jerryy replied to chris_guy_photography's topic in Fuji X-T3 / Fuji X-T30
Take a look at Fujifilm's Acquire software. It will let you save / restore camera settings. Check your manual for what menu settings you need to enable to use the save / restore features). https://fujifilm-x.com/en-gb/support/download/software/x-acquire/ -
Greetings, I hope this message finds you doing well. Another member, Ulrich.gier... sent me a message asking for some assistance that is way beyond what I can do. He needs help changing his display name from an email address to something more innocuous and safe to use. Any chance you can assist him or put him in touch with those that can? Thanks for your help. jerryy
-
‘Shooting Only’ means you will only engage the OIS when you use the half-press touch on the shutter button,. ’Continuous’ means the OIS is on all of the time. Try the continuous option to see if it works as you think it should. Usually, the shooting-only is easier on the battery, btw, if you reach down and turn the lens OIS button to off, you will not be able to make a selection (X-T30). Switch the button to on and you will be able to select between the two. This works in real time, so you can use it to check if at least some of the contacts between the lens and body are working.
-
When you go to the shooting menu, and then select the item called IS Mode, which choice is enabled?