jerryy
-
Posts
1,926 -
Joined
-
Last visited
-
Days Won
304
Content Type
Forums
Gallery
Store
Everything posted by jerryy
-
I am looking forward to seeing your images. I am working on Part Two of the jump start guide for diminishing light pollution gradients and I do hope to have it up sooner rather than later. This may help for focusing a wide angle lens: https://www.diyphotography.net/make-use-hartmann-mask-quick-easy-focusing/ You may have heard of things called Bahtinov masks or Carey masks, they work well — there are various discussions as which is better, Bahtinov masks are more well known, but once the lens’ focal length gets smaller than around 50mm or so, they are not useful because the diffraction pattern is almost invisible. The Hartmann masks works differently and can be used on planets, the Moon, and stars. And, you can make it out of cardboard you have laying around the house.
-
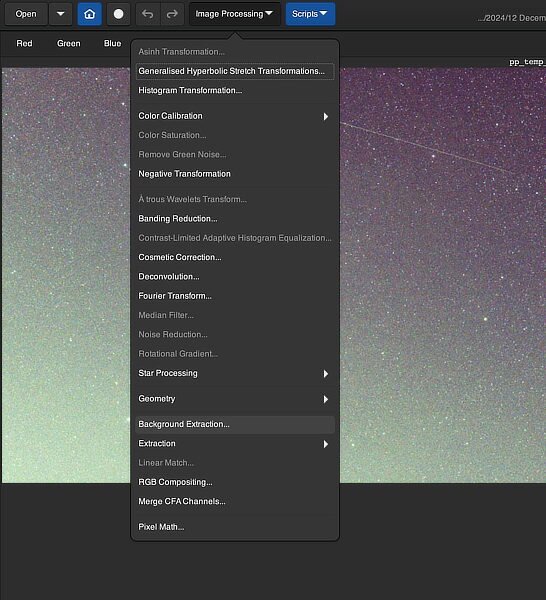
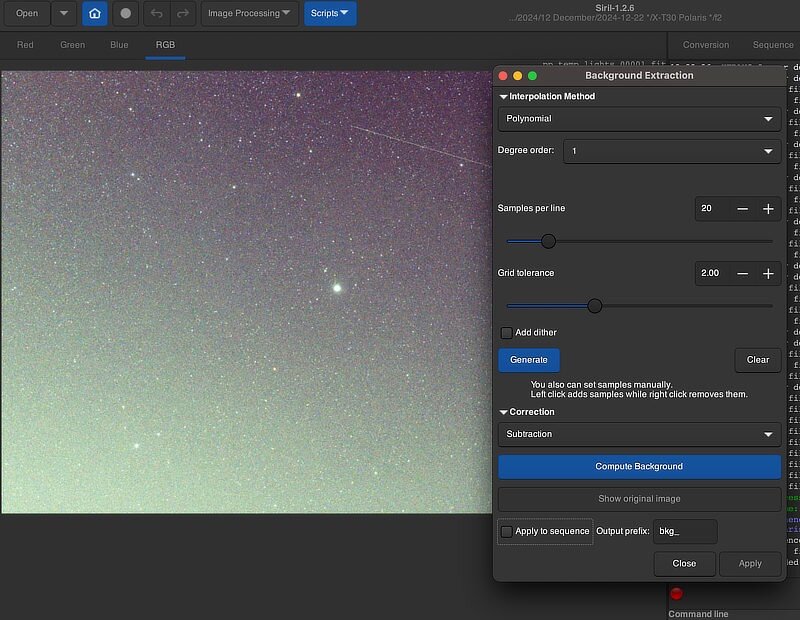
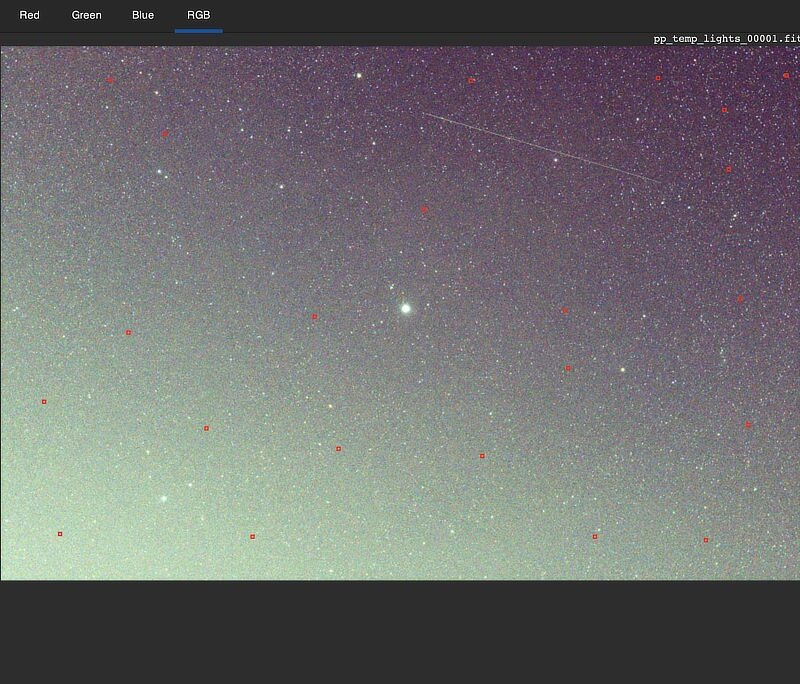
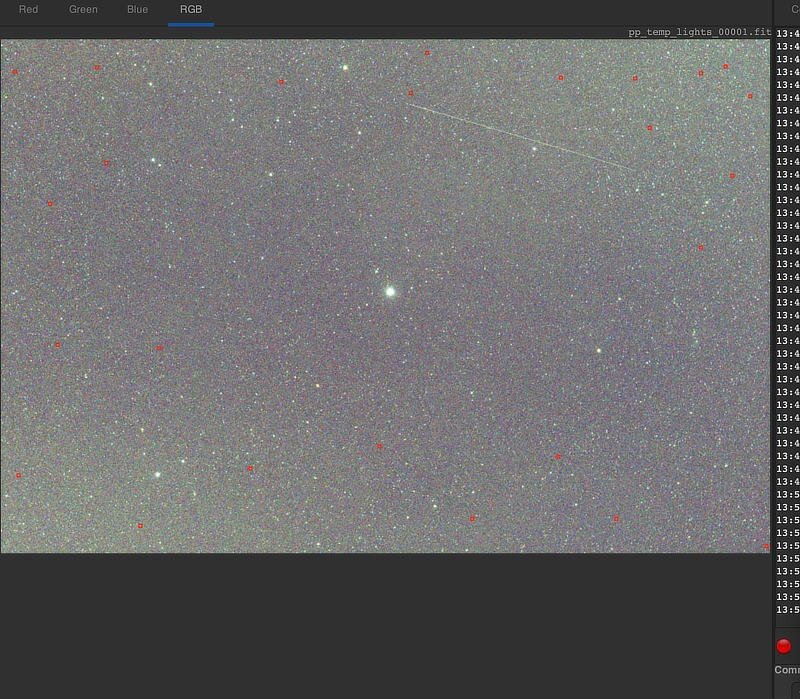
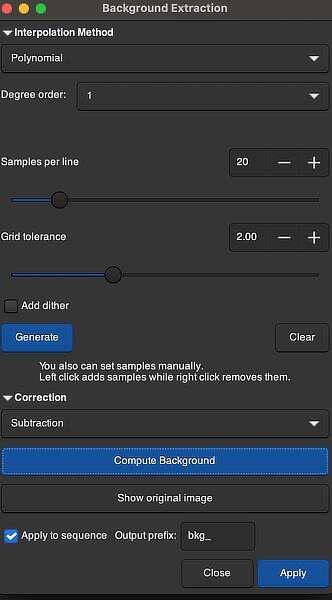
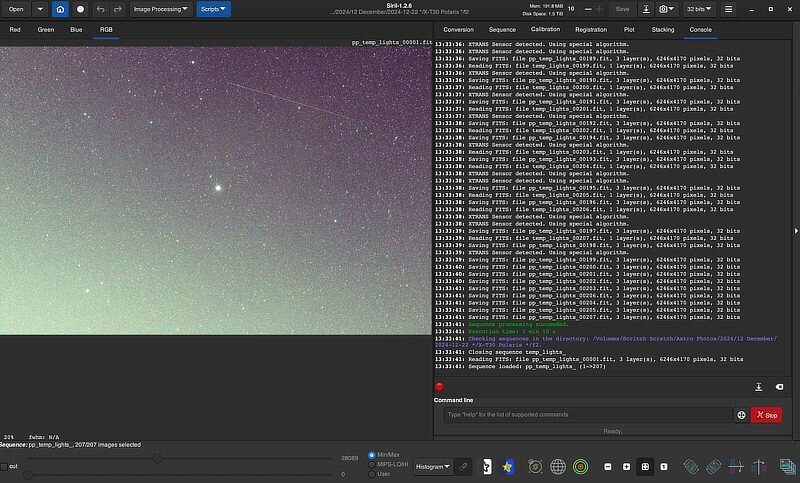
Go up into the Image Processing menu and select Background Extraction... A new dialog window will open, set the Interpolation Method to Polynomial and Degree order: to 1. Do NOT click on any other options, these will be set manually. Move the dialog window out of the way and then click on places in the main screen to place dots where you think the background should be "dark". Try to avoid places where there should be nebula parts (called appropriately enough -- nebulosity) and do not click on any stars. There is no need to put lots of dots there, a few goes a long way. If you make a mistake and want to remove a dot, right-click on that dot and it will be removed. After you think you have enough dots, click on the Compute Background button and the window should change: If things get weird, just hit the Cancel button and then try again, but Do Not Get Carried Away with trying to get this screen perfect, it is in a view mode that is used for diagnostic purposes, it not normally used for the final image. Switch the view mode from Histogram to AutoStretch and you should see the gradient is considerably diminished for this one frame. Now it is time to apply that to all the other frames. Click the box for Apply to Sequence Output prefix bkg_ and click the Apply button -- Do not click the Close button, set back and let Siril process the sequence. The window will close when it is finished. Okay, now continue onwards with registering and stacking the sequence. This is the end of Part One. I am hoping to have Part Two up sooner or later. 02/02.

-
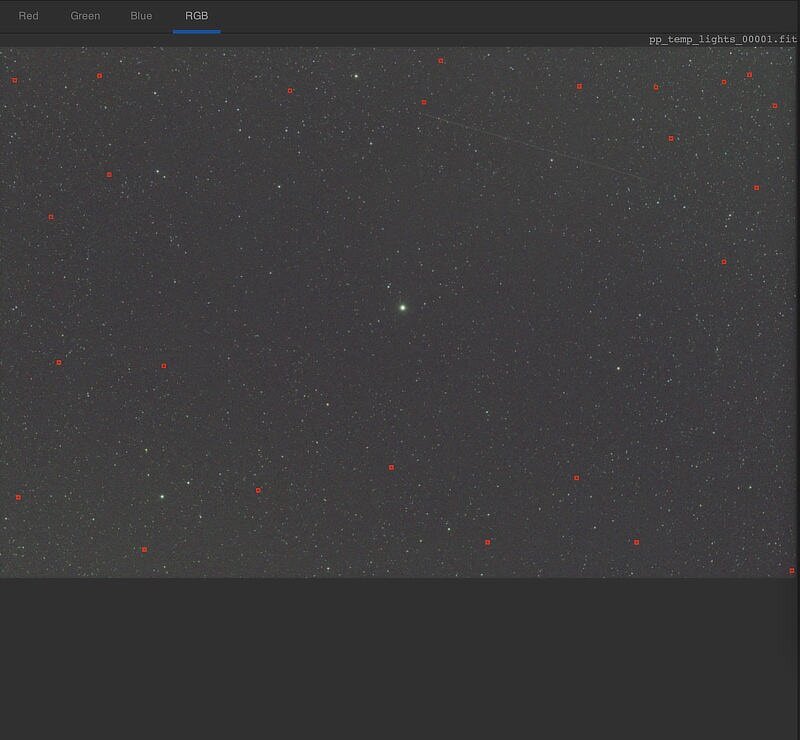
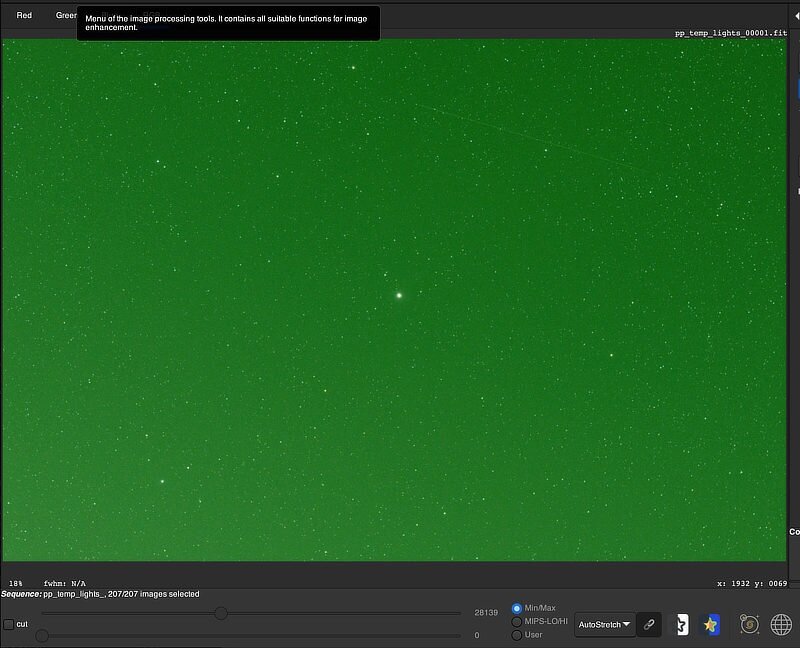
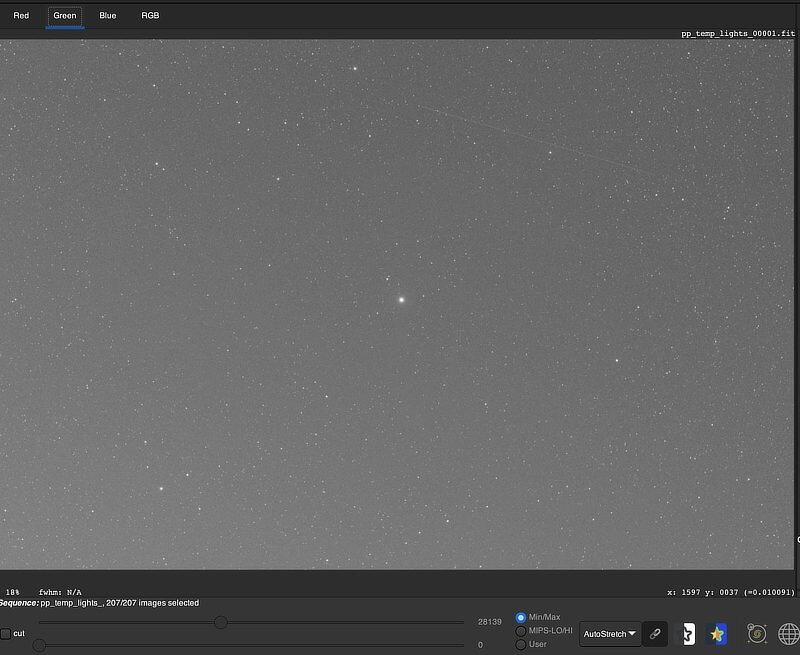
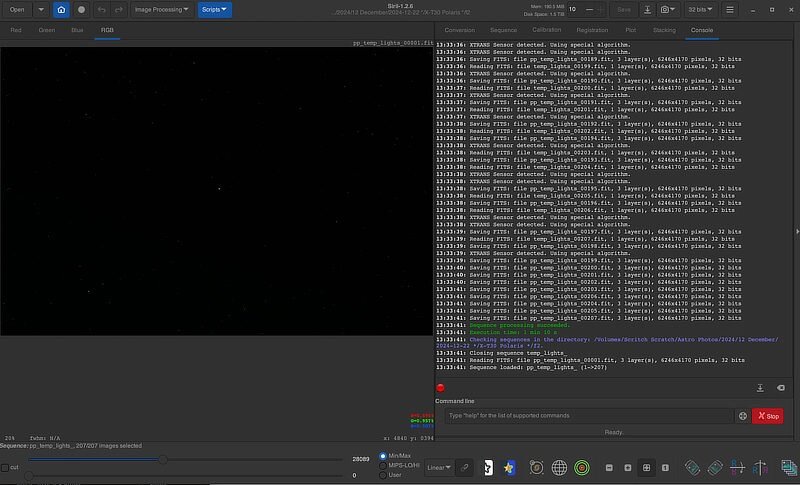
Part One Note: this approach is for manually processing the sequences, it will not work for script-based processing. If it seems like I am glibly glossing over some steps, well it will seem like that. I am not trying to re-create the user manual or re-do the many tutorials and videos on the internet that more thoroughly work through these tools. The idea of stacking is to take all of the individual frames, overlay them on top of the chosen one (the reference frame), align them based on the stars in the image, then merge them all together. This unfortunately also mushes in bad pixels which makes cleaning the final image tricky. So if the bad pixels are accounted for in each individual frame, editing the final image will be much easier. Or so the idea goes. I will start with assuming you have gotten all of the images and any calibration frames you took loaded onto your computer into the appropriate folders, turned them into the fits format and then calibrated the individual sub frames (called pre-processing) and would normally be ready to begin registering the sequence for stacking. Your screen should look something like this: It all be awfully dark, because the viewing mode is Linear. [This is actually what a raw frame looks like without any of the tone curve processing.] Change the view mode to AutoStretch and the screen will brighten up some: It is normal at this point to see mostly green. Cycle though the color channels and you will see that gradient show up, here it is in the lower left side: Go back to the RGB channel and set the view mode to Histogram: This will really make the gradient show up. 01/02
-
Very nice, I knew you would find some cool stuff there. You got Orion’s Nebula, the Flame Nebula, the Witch Head Nebula, Barnard’s Loop and a bunch more all in one 20 minute image!! The “bright schtuff” on the right hand side is called a gradient, usually from a light pollution source — but it also could also be from the moon. Gradients are one of astros (astronomy, astro physics and astro photography) banes, discussions about them can get quite colorful at times. These are mostly fixable, but I am not in a good place this weekend to be able to explain how to deal with them in Siril. Hopefully, this coming week, I will be able to give you some pointers. Of course, the internet is chock full of tutorials about removing gradients and over in PixInsight land there is something called GradientXTerminator: https://www.rc-astro.com/software/gxt/ There is a standalone program: https://graxpert.com that may help you. Siril does have built in tools for removing or diminishing them and I hope to be able to come back and give you some pointers. Very well done! p.s. The Milky Way season has started, right now in your area it should be visible around midnight or so — earlier as the season goes on. Your 16mm lens should get you some beautiful keepers.
-
Hmmm, there are some things you might try. Assuming you are using .raf frames, jpeg or tiff* frames do not work well for astro stuff, open one of the raw sub frames in your favorite raw converter (even Fujifilm’s Raw Converter will work) and push the ev exposure all the way to the right, in the + direction, as far as +3 ev or as far as it sill go. You should see nebula stuff showing up, it may be faint, but if that frame has any, you will see something. Based on the image you posted, there is a pretty good chance you have some of Barnard’s Loop hiding there. You are probably using Windows since DSS does not run on macOS, have you considered using Siril https://siril.org ? It will work with .raf files without needing to convert them. edit: I should also mention ASTAP: https://www.hnsky.org/astap.htm works with .raf files. edit: Affinity Photo, which you have probably heard about more as an image editor, has an entire built in section for astrophotography and has some macros written by James Ritson (one of the developers) that some folks like. Starnet is a free version of Star Exterminator, it works with both PixInsight and Siril or as a standalone app. It has its fans and detractors like any other plugin, but it may give you some help for stretching the starless nebula regions. https://www.starnetastro.com/download/ Welcome to the next, altogether different kind of fun step of astrophotography, processing the images. Very different from the fun of getting the images. * tiff frames that are still linear will work, but tiff frames that come from converting raw frames do not work well because they have had a tone curve (essentially stretching the image) applied to them.
-
The online manual (page 6) says this about the battery: ... "1 Camera uses the Rechargeable Lithium-ion Battery * When shipped, the battery is not fully charged. Always charge the battery before using it." ... https://www.manua.ls/fujifilm/finepix-s2980/manual?p=6 The manual also says that rechargeable Ni-MH batteries are okay for use as well as alkaline batteries. If you are curious about the care and feeding of Ni-MH batteries: https://www.batterystuff.com/kb/articles/battery-articles/proper-care-and-feeding-of-a-nimh-battery.html So, either the Duracell(s) or the Sanyo(s) or the Panasonics should be okay.
-
Welcome to the forum. According to an online manual, your camera originally came with a rechargeable battery, I am guessing a lithium-ion type based upon the way the manual presents its information. Listings for the Panasonic battery you say you are using decribe it as being used in low-drain situations, so it may not be best suited for cameras. You could try removing the batteries after you use the camera, at the risk of losing the stored time, date, etc. information — you would need to reenter it when you are ready for the next session. Or you could try the Duracell batteies you mentioned. They sell rechargeable batteries specifically for your camera which hopefully would work for you.
-
Welcome to the forum. This may help: https://camlitic.com/blog/mastering-flash-functionality-with-the-fujifilm-x-s10/#:~:text=With this camera model%2C we can easily turn,(MF) menu options%3B thirdly select your desired ch According to the article, there is another step to turn the flash on, p.s. As far as the other question you posted, it sounds like the camera is in aperture mode, maybe the top dial is not really turned to M, but is stuck on A.
-
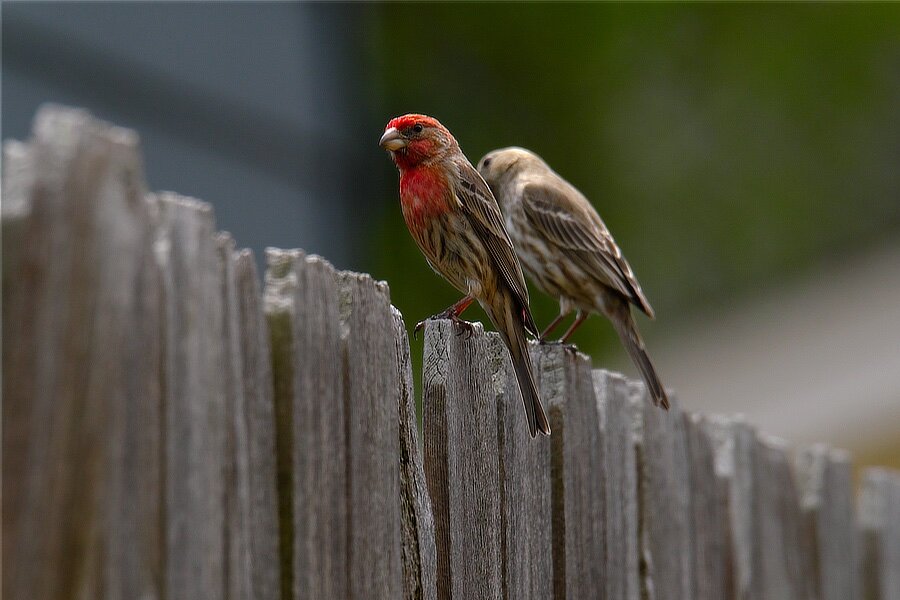
This is pretty good. How did you go about stacking the sub-frames? I think once you recover from the fun you had, and decide to start editing, you will find a lot of detail in this image. More please.
-
Red Head ... I believe these are House Finches (Haemorhous mexicanus).
-
As @Olaf W. mentions, knowing which equipment you will be using would make it easier to offer editing suggestions. There are plenty of no-cost and low-cost (and high-cost) editing softwares available, some are cross platform, some are only for particular operating systems. The Affinity Photo option @pw-pix mentions is very good and would be in the low-cost group. By editing, do you mean things such as changing white balance settings or film simulations or cropping or something more substantial? Also, if you are intending to edit your images, have you considered shooting in raw instead of jpeg? There are plenty of advantages for you to do that and if you decide you wanted just a jpeg version after all, it is very, very easy to get that, hardly any effort at all.
-
X-E2S Settings
jerryy replied to learner's topic in Fuji X-E4 / Fuji X-E3 / Fuji X-E1 / Fuji X-E2 / Fuji X-E2s
It seems that you have something specific in mind, but the information you are giving us to work with is so vague that it is difficult to know where to start saying things to help you. Can you post an image and say what you wanted it to show and why you think it does not get there? Make sure to include the settings you used at that time. -
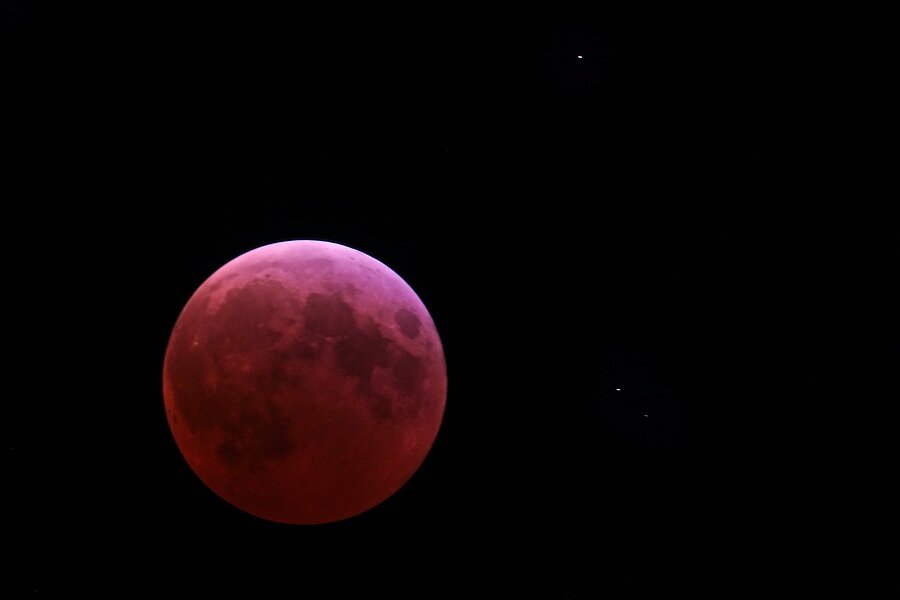
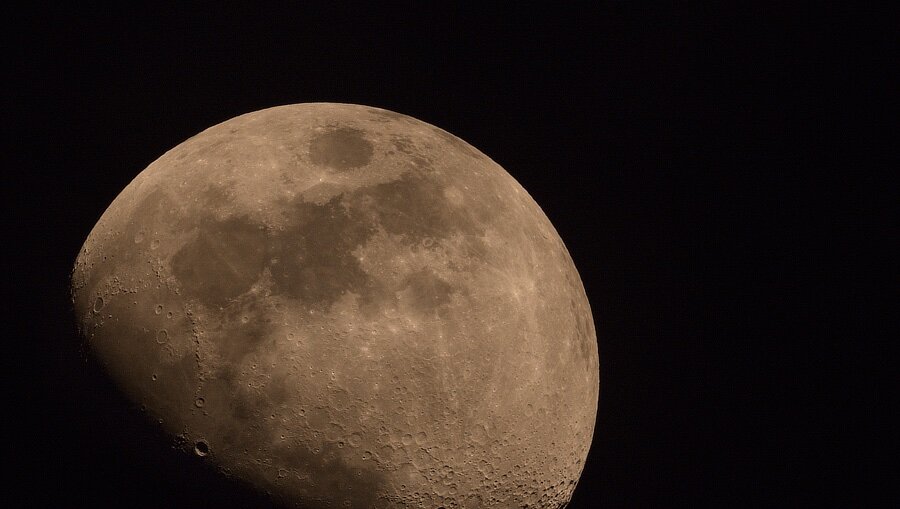
So far, it seems like the eclipse is no different visually in the sky than the normal waxing and waning. But as the Moon drifts deeper into the Shadow, the rest of the Moon re-appears tinted red. Full eclipse. 3 / 3.
-
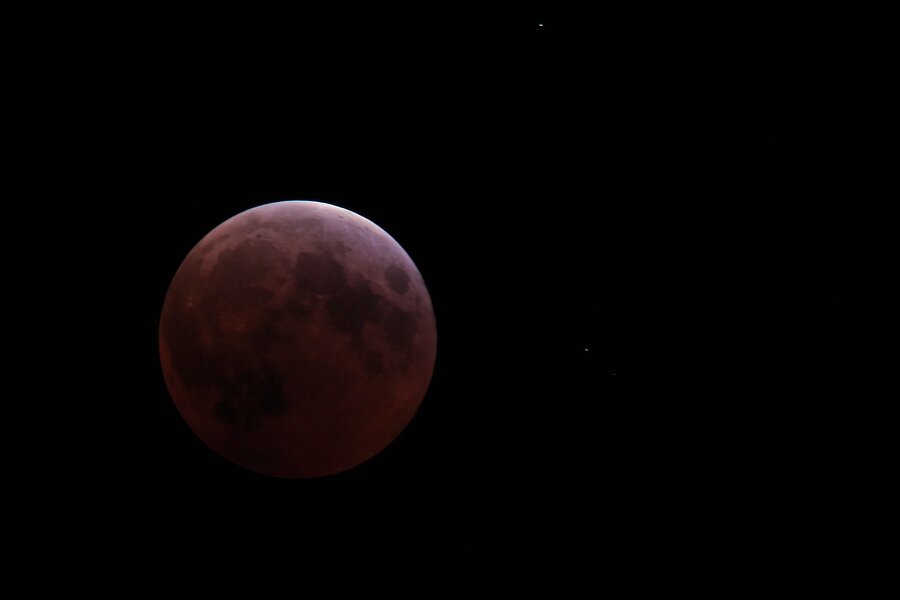
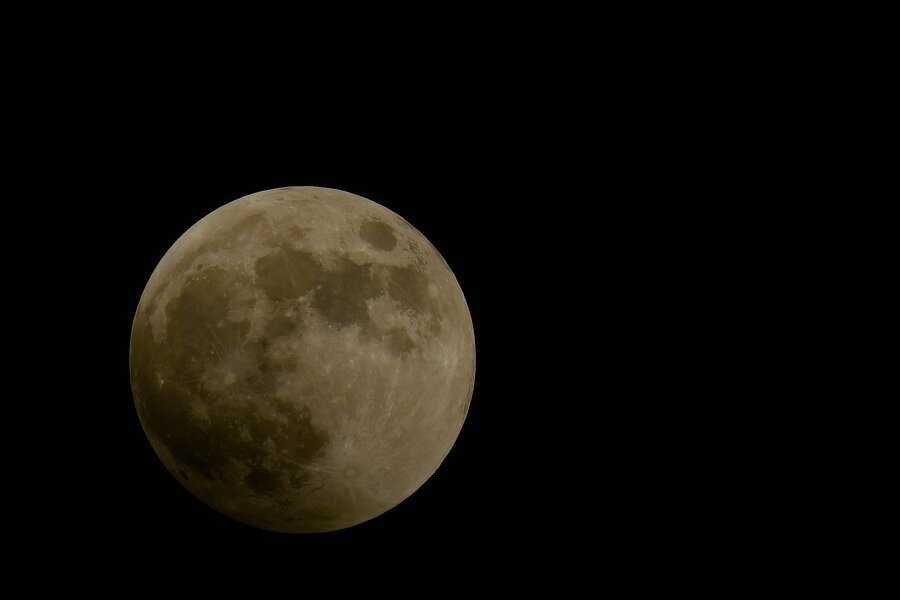
The Shadow is winning, the Moon is disappearing. 2 / 3.
-
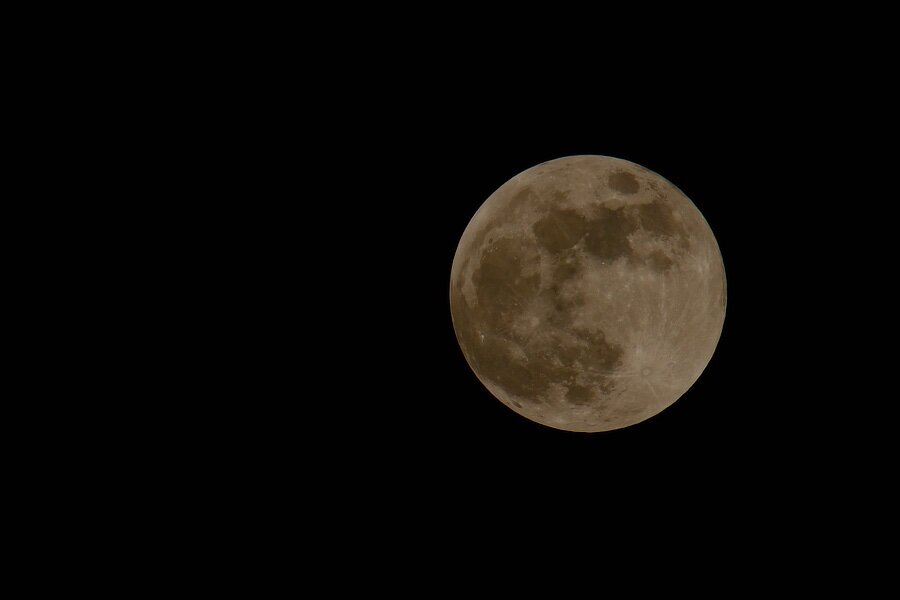
No dragons. The Moon is just starting the Penumbral Eclipse (the Moon moves through the outer part of Earth's shadow called the penumbra). A little later, the shadow is overtaking the Moon. 1 / 3.
-
I hope things went well.
-
Just a quick reminder, the Earth is supposed to eclipse the Moon soon. https://science.nasa.gov/solar-system/moon/what-you-need-to-know-about-the-march-2025-total-lunar-eclipse/ https://www.timeanddate.com/eclipse/lunar/2025-march-14 🤔 As far as I know, a host of dragons is not going to erupt out of the dark side of the Moon and swoop down to devour the Earth.
-
Does anyone please know what kind of an "L" bracket.
jerryy replied to SimonF's topic in General Discussion
Something like this should work for you: https://www.smallrig.com/smallrig-l-bracket-for-fujifilm-x-s10-camera-3086.html It is Arcs-Swiss compatible, as is a lot of Benro tripods, or if your tripod’s ball head is not, you should be able to swap the ball head for one that is Arca Swiss compatible fairly inexpensively. Note: AliExpress and various auction sites carry similar l brackets for the X-S10. -
Why Do JPEGs Look Darker on My Phone?
jerryy replied to tanteisnaps's topic in Fuji X-T5 / Fuji X-T50
Unfortunately monitors are not all calibrated to display images the same way. Not to mention that over time, the same monitor will “degrade” or rather drift away from its factory settings and show the same image differently. This issue is a real pain for people, sometimes the best you can do is hope for the best realizing one monitor will show an image as just fine and another will show the same image as having noise and artifacts or being darker or lighter than intended. Try keeping the monitor you use for developing your images calibrated and go from there.