jerryy
-
Posts
1,926 -
Joined
-
Last visited
-
Days Won
304
Content Type
Forums
Gallery
Store
Everything posted by jerryy
-
The types of distortions that would appear are barrel or pin-cushion distortions, but this shot does not seem to have any. The 35mm is in the “wide-angle” lens group and the 50mm is in the “normal” lens group. Going from the wider to the narrower will give you some lens compression effect, where things look a little more smushed together. That effect is more pronounced going from wide angle to telephoto, i.e. lenses 70mm or longer. Looking correct is subjective, if you were used to the 50mm - 70mm range, you would probably not have noticed this effect when you changed from the Sony world.
-
RAW file image dimensions - can they change?
jerryy replied to DTyler's topic in Fuji X-H1 / Fuji X-H2s / Fuji X-H2
That is normal. Raw files save everything from the sensor with only the most minimal processing. The different sized jpegs are processed, a type of editing with size changing being one of the edited parts. However, you cannot go back to the original from the processed jpeg. With full sized raw files, you can use an editor and make changes you want -- including scaling them smaller, discard the changes and start over -- from the original file. If the size were smaller, you could not go back and recover missing detailed information. -
It would be easy enough to say 'set it at f14 and best wishes'. That would be doing you a dis-service. APS-C sensors are different than medium format or 35mm film, some like to think of them as similar to shooting slide film -- exposure seems to matter more than dof, but that also is a much too big of a generalization to go by. Just like the Sunny 16 rule and the hyper-focal distance rule guidelines your teachers taught you way back when were starting points to build from, one decent way to get going to to remember every image setting is different. That may seem too vague, but just start from scratch, so to speak; pick out several familiar scenes you favor, put the camera on a tripod and shoot differing f-stops. Digital film is very, very, very cheap. After a while, your intuition will take over and you will be getting the dof you want. One thing you might not want to consider yet, different lens can go deeper than others -- deeper as in in higher numbered f-stops before diffraction occurs, you have to read reviews to know which ones will and will not, so to speak. Focus stacking is easy enough using digital files in an external editor, your camera will need to get the frames manually though.
-
LCD monitor too bright
jerryy replied to FrankFitz's topic in Fuji X100VI / X100 / X100S / X100T / X100F / X100V / Fuji X70
Hmmm, that sounds like you and the camera engaged in some sort of epic type of struggle. 😃 I am glad to read you got it working. p.s. Welcome to the forum. -
LCD monitor too bright
jerryy replied to FrankFitz's topic in Fuji X100VI / X100 / X100S / X100T / X100F / X100V / Fuji X70
Yes, yes there is a way to change that. https://fujifilm-dsc.com/en/manual/x100t/menu_setup/screen_set-up/ Scroll down to the LCD brightness section. -
That does look like, just for kicks, the software decided to mess around with the tint slider in the white balance section. Ugh. As the video shows, Affinity Photo does work with the Capture One, and if you want to give yourself a fast preview, it does do raw conversions as well, so you can decide if you want to really pursue a composition using everything from C1 and AP.
-
It sounded like you are wanting to use something allowing you back-and-forth tweaking between the individual frames and the stitched panorama. The new V2 version of Affinity Photo makes that process easier than before. Otherwise, you can export TIFF images from Capture One, there are a lot of stitching programs out there from ones like PTGui regular or Pro, or Hugin down to various free ones. But you might need to spend more time working the various exposures in C1 to get things well matched in the final image.
-

-
Does this help? https://www.youtube.com/watch?v=vSUhKyzyF3A
-
IBIS helps if your hand-held shots get a little shaky after hiking for a while, especially if you are shooting video. If, on the other hand, you are using a tripod(*) it probably will not help at all. These may help you decide: https://lensguide.io/fuji-x-mount-video/ https://www.digitalcameraworld.com/news/fujifilm-user-these-are-the-lenses-you-should-be-using-to-shoot-video If your budget will let you splurge: https://www.bhphotovideo.com/c/buy/fujifilm-x-h1-and-cine-lenses/ci/38208?msclkid=6aea51817e401ebfdb3f35137bc07e9d (*) I have read claims that using IBIS helps if the tripod is not super, extra stable, but I am inclined to think using IBIS / OIS that way will instead cause a feedback loop and mess up your images. p.s. Welcome to the forum.
-
I am sorry to hear that. I think you will need to take it to a camera repair shop. They will be able to at least tell you what is wrong.
-
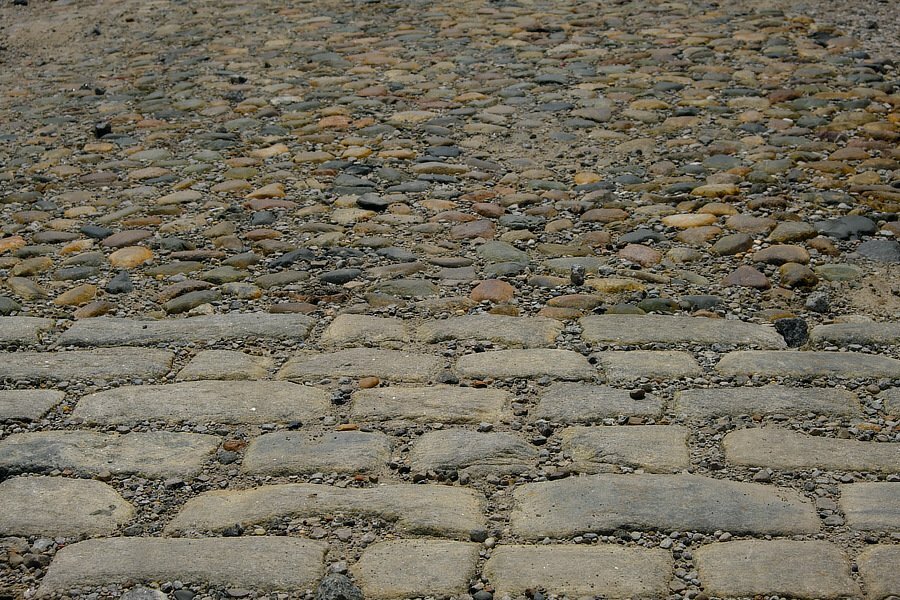
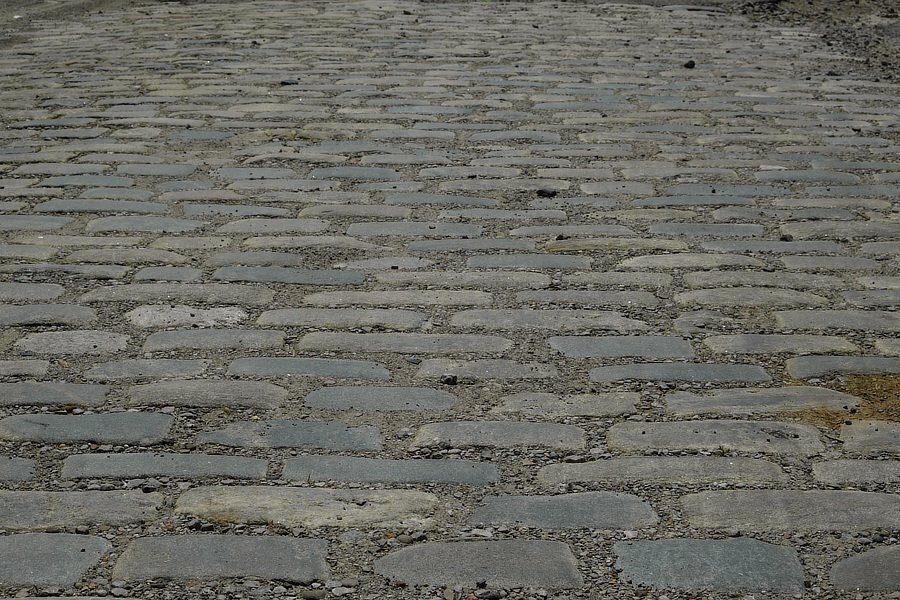
Not European old, but old nonetheless ...
-
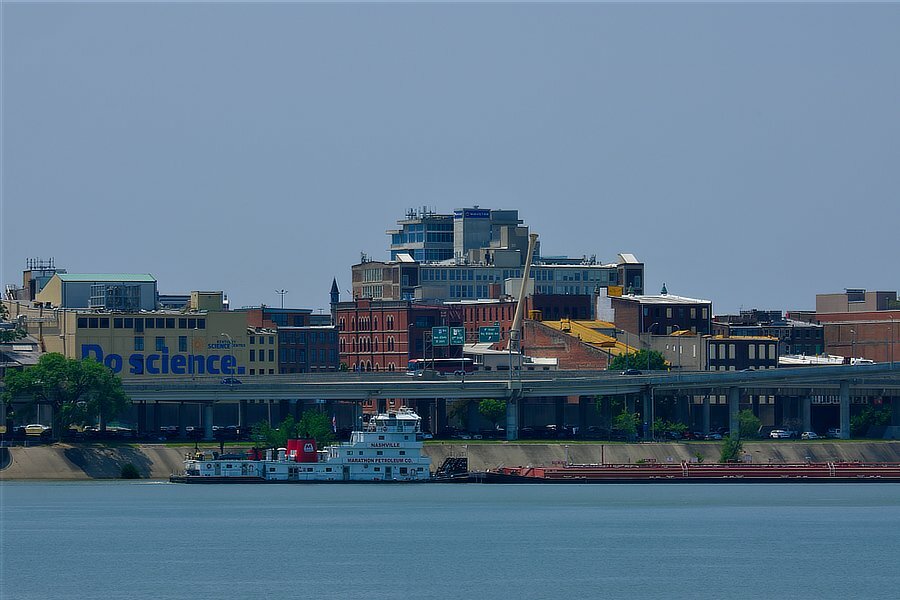
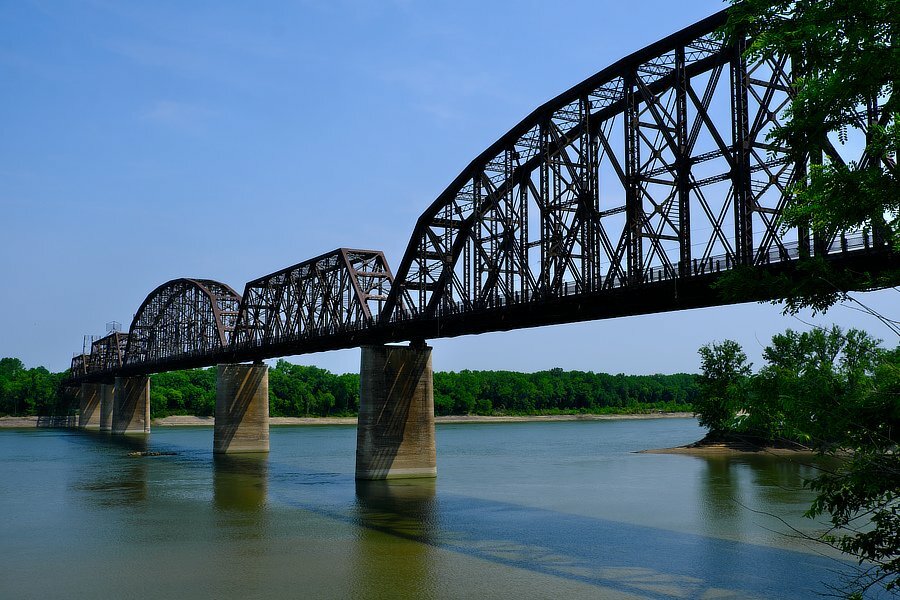
Ohio River, Kentucky - Indiana, USA Ohio River, Indiana - Kentucky, USA
-
Sometime a short break can help to phrase things so that they do not sound annoying, Well that is the hope anyway, so here goes. Having that meter would be nice as well as having the histogram. But having them or not is a minor consideration in terms of what you are wanting to do because the app does not work with intervalometers. The only way you can get a time lapse sequence using the app is to manually click the shutter button, wait then click it again and so on. Even if the meter were there, you would need extremely fast reflexes to see and react to a lighting change by changing the settings and then going back to clicking the shutter button. Doing that for hours would be a feat indeed. The equipment you mention does this by analyzing several past images and predicting what settings to apply to the next incoming image. Right now the app has the live view which will tell you if an area is over or under exposed, but as far as what you are wanting to do without being able to connect the app to an intervalometer, well …
-
Nope the exposure indicator meter only shows when using an external intervalometer, it does not show when using the internal one or when using the app. The work around is time limited, a variation of what I have described above, tethering the camera or grab an image using the app. Open the image in Raw Studio or an editor and look at the histogram, etc, You will see if it is over/under exposed. Tethering or connecting via usb to grab the image is fastest, the remote app is okay. If clouds are rolling in, it can be tricky at first. studio shooters use tethering a lot.
-
Perhaps you can post an image showing what it is you are wanting to see.
-
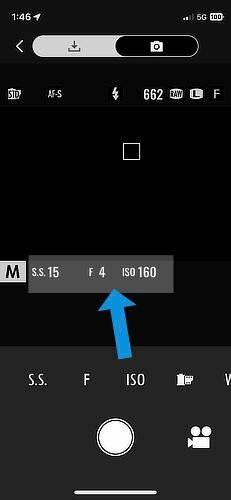
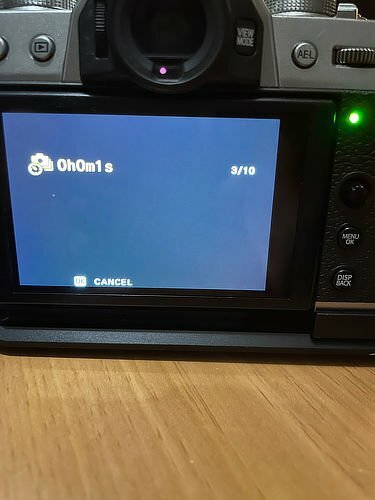
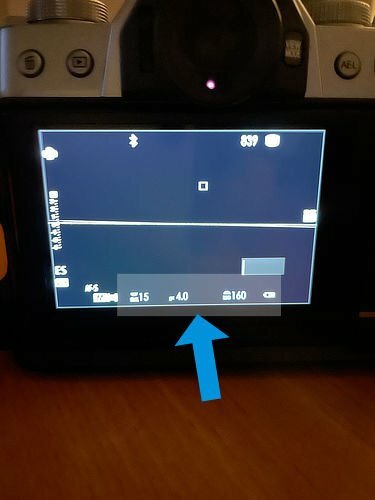
Here you go: This is the back of the camera ready to go (no app or intervalometer started). The arrow is pointing to the exposure settings. Here they are in the app. And for reference, this is the back of the camera when the intervalometer is running: The biggest problem is that currently, the app does not work with intervalometers. When I am shooting astro photos, I use the intervalometer to grab a sequence, then use the app to grab a shot and use it for plate solving, focus checking and exposure checking. Then switch back to the intervalometer for another batch. As long as the analysis time is not too long a stretch, there is not a problem.
-
The app does show you the settings it is using for the image, they are exactly the same as the ones that show on the lcd or viewfinder when using the intervalometer. You can see them listed in the screen shots I posted, I did not take the lens cap off to show how they would apply to the image is the only difference. The app puts what was on the lcd screen (live view and settings info) onto the phone screen. I shoot many hundreds of frames at a time when I am getting astrophotography photos, so I am aware of how exposure changes throughout the night.
-
As I mentioned, I have never been able to get the app to work with an intervalometer, so the only way I can think of at the moment to use the app to get a time-lapse sequence is to click the app’s big round shutter button yourself, wait a while then click it for the next image and repeat until you either fall asleep or get all of the shots you need. As far as monitoring goes, while the screen shots I loaded do not show it, the app shows how the image would look using the currently chosen settings — I took the screen shots with the lens cap on. The image appears in the black box in the middle. Change a setting and the image brightens or darkens to reflect the change. Also, if you have enough time between image captures, you can switch over to the import tab and grab a copy of whichever image you want to see, the app will download a jpeg image version to your phone which you can take a look to see how things are going, then switch back to image capture.
-
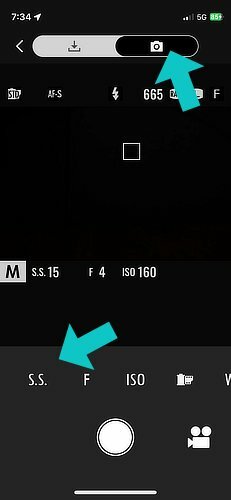
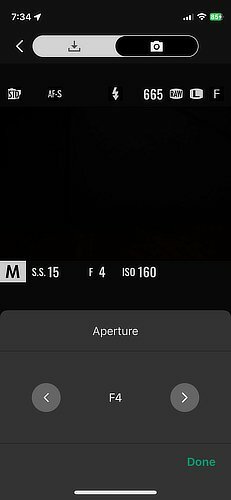
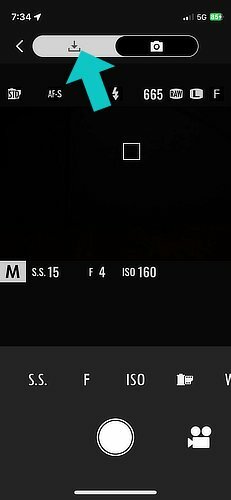
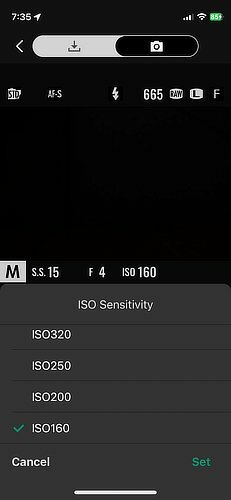
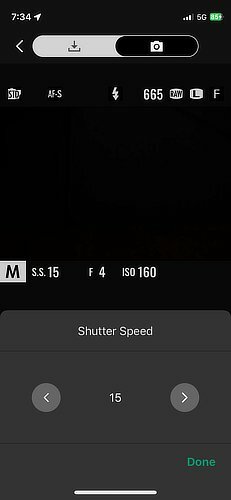
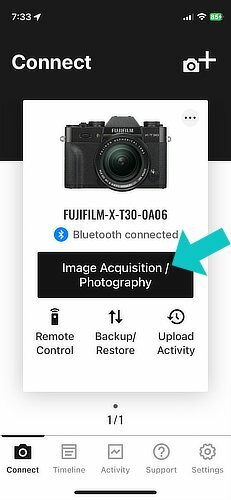
For this demo, my trusty X-T30 volunteered its services: I am assuming you were able to get the app up and running on your phone and got to the start screen. Click on the Image Acquisition / Photography button. Doing that should take you to this screen: The top part has two choices, make sure the one with the camera icon is chosen. Then below the current exposure listings are the icon buttons to change the settings. Choose S.S. to bring up the Shutter Speed screen: Use the left or right arrows to change it. Click Done when you are finished. You can change the Aperture setting by choosing the "F" icon button. Similarly, you can change the ISO setting: I will leave it to your adventurous self to explore importing images: And that is it for the basic exposure settings, as you can see there are other settings to change or leave alone. i hope this helps.
-
https://fujifilm-x.com/en-us/support/compatibility/software/xapp/ https://fujifilm-x.com/global/products/software/xapp/ It works on my X-T30, so far. It has one feature to be careful regarding using it. GPS support is an “always on” requirement to be able to use the app. Additionally, the GPS will need “use precise location” turned on, this is no biggy, it means the GPS is using the phone’s GPS location rather than the older less precise method of using wifi location. But, having the GPS always on is more troubling, because while you can turn that on and off in the phone’s main setting menu, you have to have it on just to use the app for any of the other remote’s features. So it is running in the background using your batteries (camera and phone) even if you do not want location info embedded in the image files. Remember to turn this (use location setting) back off in the phone’s main settings menu after you are finished using the app or you could potentially drain the batteries while it is running in the background.
-
I have never been able to get an external intervalometer to work while using the remote app, I can use one or the other separately, but not both at the same time. That said, if you use the app by itself, it does allow you to change the shutter speed, f-stop, ISO, and a few other settings. I suspect enough folks will need to request that the app work with intervalometers to have the feature.